How to Recover Deleted Email Files

How to recover your email quickly and efficiently?

The best answer is Wiserecovery. So we should know something about Wiserecovery first.
WiseRecovery is an easy-to-use data recovery software that recovers lost and deleted data from hard drive or other storage media due to deletion, corruption or formatting of any storage device. It helps in cases of hard drive corruption or formatting, virus attack, malfunction etc. Every day, WiseRecovery helps hundreds of users recover their lost or deleted data. It supports 600+ file formats; almost all file system (FAT, NTFS, HFS, UFS, exFAT) WiseRecovery is everything you need to get lost data back.

Nowadays, people communicate via email more often. It is the most convenient way to contact with others except telephones. As an email user, you may snd emails a lot.
But you can not check your spam box if there is useful emails moment by moment. But sometimes when you delete or can not find these emails, what shold you do? Just
crying like a baby? No , that definitely can not solve the problem. I had the similiar experience. When my teacher sent me an importmant mail about my thesis, I deleted  mistakenly. Worry and upset is useless. On Internet, I found Wiserecovery. It worked perfectly.

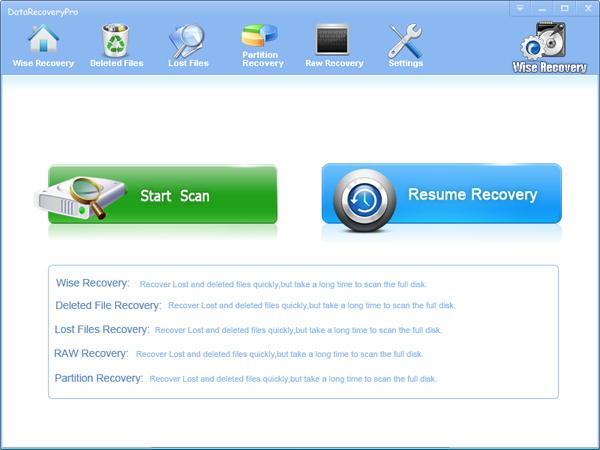
  1. Run WiseRecovery, Click on the button [Start Scan].
  2. Select a volume to start scan. Then click Scan button to continue.
  3. After scanning, list of file folders will be displayed in the left pane. You can click on each folder to see the hidden files until you find the files you want to recover.
  4. Click on the folders where the files are put. The details will be shown in the main window. Tick the small box in front of the files you want to recover, and then click Recovery button. There will be a pop up window for you to get the recovered files.

More information you can get from here: Wiserecovery


Digital Photos Recovery Software

With the widespread of digital products, the oldest camera film has outdated. Modern people prefer use digital camera or other products instead of the older one. And digital photos become more and more popular. People usually save their digital photos in their SD card, computer and any other device. However, it is actually not safe to save the photos in this way. In this situation, digital photos can be easily lost.

It could happen in the following situation:

You formatted your SD card or device accidentally

Your computer’s system crashes and the whole files are corrupted

You delete digital photos from your camera by mistake.

It’s really awful to lose the digital photos. Because digital photos can be regarded as a good memory card for the past time.  Once the photos are missing, the memory cannot be stored forever. So let us try to find a good way to fix it.

Wiserecovery is just the right software for you to reover your lost digital photos.

Wiserecovery acts the most important role in the recovery software market, which is famous software that helps you recover lost data from Hard Drives, PCs and Laptops, Memory Sticks, USB storage media, SD card, cameras, cell phones or other storage media. It performs read only operation and will never do any damage to your card or hard drive. WiseRecovery also can recover your deleted or lost files due to situations of corruption, formatting, virus attack, etc. With WiseRecovery you don’t need to worry about your lost data any more.

How to recovery digital photos with WiseRecovery?

1. Download WiseRecovery Data Recovery Software, install it and launch it. Click the “Start Scan” button on the main window of Data WiseRecovery

2. You can see the list of all volumes found on your computer, select the exact drive and click the “Next” button to start scanning. If you can’t see the drive, please make sure your external drives are connected, and click ‘Refresh’ button.

3. It will take about 2-10 minutes to scan, it depends on your disk size and files amount on the disk. After scanning is finished, you can preview text document and picture files.

Note:If you are not able to get the desired results after Deleted File Recovery, go back to home window and select the option “RAW Recovery” or “Partition Recovery “.


How to Recover Powerpoint Documents

WiseRecovery Powerpoint Recovery Software will help you get the lost Powerpoint documents back.
It supports all versions of Powerpoint:
PowerPoint 97
PowerPoint 2000
PowerPoint 2002
Office PowerPoint 2003
Office PowerPoint 2007
PowerPoint 2010 

Powerpoint is often abbreviated PPT. It is a  software presentation program developed by Microsoft. The users can not only be present on Projector or computer but also printed them and made photographic film in order to apply wider areas. They can be called presentation files when we create them with Powerpoint.  It is a kind of file, its format is also called .PPT format. Each page of presentation files is called slides, each slide  are both independent and interrelated in presentation files. In recent years, PPT is more and more close to life. Application field is more and more wide, it is becoming an important part in people’s work and life such as work report, Company Promotion, Product outline, wedding ceremony, Project bidding, and management consulting etc.

But some users have this kind of experience: the PPT presentation you have made so hard is corrupted or deleted with some reasons, and you will be frustrated in this situation.
First, you should know: the lost files are recoverable. When you delete a Powerpoint file from your PC hard drive or memory card, you just delete the entry of the file. Actually the file is still on your computer. In most cases, windows will not delete the real file content. If the files are not overwritten by further operation, all the deleted Powerpoint documents can be recovered.

Second, WiseRecovery Powerpoint Recovery Software is designed to recover lost files on computer hard drive and memory card.

You can get the exact steps to recover PPT documents with Online-help in our web set.

So you should be relieved. This will be easily resolved by Wiserecovery.

If you want to know more information about Wisefixer or how to recover data or files, please click here: Wiserecovery.

How to Recover RMVB Files


About RMVB
RealMedia Variable Bitrate (RMVB) is a variable bitrate extension of the RealMedia multimedia container format developed by RealNetworks. As opposed to the more common RealMedia container, which holds streaming media encoded at a constant bitrate (CBR), RMVB is typically used for multimedia content stored locally. Files using this format have the file extension “.rmvb”. RMVB files are extremely popular for distributing Asian content, especially Chinese television episodes and movies.
Why RMVB files can be recovered?
Actually there is something named file allocation table in all disks in your computer, such as floppy drives, hard drives, as well as CompactFlash and SmartMedia cards. Technically, a file allocation table (FAT) is a table of contents which tells the computer where files lie on the disk, how long they are and what their names are. If the disk’s FAT is corrupted or deleted, the computer can never locate the wanted data in the disk. So you cannot see your deleted files. However when you delete some files you didn’t delete the real files, it is the file’s entry from the file allocation table that have been deleted. The actual contents of the file are still there on the disk. This is just like a book without a bookmark, you cannot locate the exact page you read last time immediately.
How to recover RMVB files with Wiserecovery

  • 1. Download WiseRecovery Software, install it and launch it. Click the “Start Scan” button on the main window of WiseRecovery.
  • 2. You can see the list of all volumes found on your computer, select the exact drive and click the “Next” button to start scanning. If you can’t see the drive, please make sure your external drives are connected, and click ‘Refresh’ button.
  • 3. It will take about 2-10 minutes to scan, it depends on your disk size and files amount on the disk. After scanning is finished, you can preview text document and picture files.
  • 4. Select the files or folders that you want to recover and press the “Recover” button, on the popup window, please select target directory to save the recovered files. WiseRecovery will recover files instantly. Now you can click ‘open the destination directory’ button to see the recovered files!
  • Note: Please don’t recover the file to the disk you are recovering files from!

How to Recover Doc and Docx Files of Microsoft Word

People never doubt the importance of Word Document. If the word is missing or corrupted, it will bring lots of trouble for people. Therefore, there is an increasing number of software which is designed for recovering word document.

You can never ignore the magical power of WiseRecovery. It’s one of the most effective recovery tools for data recovery. Once you encounter an error about the form: *.DOT, it shows that your file may be corrupted. In this situation, don’t panic. Since we can never avoid this, we should try to figure out the way to deal with it. Data corruption often occurs in many different ways. But it doesn’t mean we have no idea about it. Doc and Docx files can be recovered by WiseRecovery.

The recoverable document format:

1.Microsoft Word 97 (doc)
2.Microsoft Word 2000 (doc)
3.Microsoft Word 2003 (doc)
4.Microsoft Word 2007 (docx)

What is WiseRecovery?

Wiserecovery is powerful office recovery software that can help you to undelete files, even if you’ve emptied your recycle bin. It can also recover lost files after a system crash and the files damaged by mistake under Win XP, Win7, Win vista, Win 2008 and Win 2003.

How to recover Doc and Docx with WiseRecovery?

  1. Download WiseRecovery Data Recovery Software, install it and launch it. Click the “Start Scan” button on the main window of Data WiseRecovery.
  2. You can see the list of all volumes found on your computer, select the exact drive and click the “Next” button to start scanning. If you can’t see the drive, please make sure your external drives are connected, and click ‘Refresh’ button.
  3.  It will take about 2-10 minutes to scan, it depends on your disk size and files amount on the disk. After scanning is finished, you can preview text document and picture files.

Note: If you are not able to get the desired results after Deleted File Recovery, go back to home window and select the option “RAW Recovery” or “Partition Recovery “.

How to Recover Lost Files from Memory Stick

Wiserecovery can do this: Undelete documents, photos, emails, video and database in Hard Drive, Memory Stick, Laptop/PC, Camera, Cell phone and other removable.

The reasons that cause data loss on memory stick?

  1. Accidentally format the memory stick.
  2. Computer viruses and malware infect or corrupt.
  3. Wrongly delete data in memory stick.
  4. Power failure or surge causes some damage.
  5. Unexpected system shutdown or application failure.
  6. Recycle bin has been emptied.
  7. Other unknown reasons.

Memory Stick is a removable flash memory card format and is also used in general to describe the whole family of Memory Sticks. The memory stick is light and handy, and owns comprehensive function. Its high compatibility and unprecedented Universal Media concept provide a new generation of digital information storage and exchange media with faster, larger capacity for future high-tech PC, TV, telephone, digital cameras, camcorders and portable personal audio-visual equipment. In addition to small dimension, high stability and copyright protection function and easily used with all kinds of memory stick series products, it’s advantage lies in the extensive use of the technology products launched by Sony, for instance, DV camcorders, digital cameras, VAIO personal computers, color printers, the Walkman, the IC recorder, LCD TV, and some of the memory stick can be easily connected with PC and Mac.

So it is welcomed by the broad masses of the people. But do you think about how to deal with this if it is crushed or corrupted and lead to the missing of files that stored in the memory stick? It is a serious problem, because to get the lost files back is not an easy job. Professional data recovery tool is necessary in this situation.

  1. Run WiseRecovery, connect your memory stick to your PC, and click on [Start Scan].
  2. Select a volume to start scan. Then click Scan button to continue.
  3. After scanning, list of file folders will be displayed in the left pane. You can click on each folder to see the hidden files until you find the documents you want to recover.
  4. Click on the documents you want to recover. The details will be shown in the main window. Tick the documents you want to recover, and then click Recovery button. There will be a pop up window for you to get the recovered documents.

I believe this is the easiest way to recover the lost files of memory stick. If you are puzzled with this kind of problem, you can resolve this with Wiserecovery with confidence.

More information click here:Wiserecovery.

How to Recover Data from Crashed Hard Disk?

Nowadays, Hard Drive can be easily crushed, which can often result in critical data loss.

Although there’s something that we can’t control, we should know much information of hard disk.

We should try to learn how to recover data from crashed hard disk.

Few Types of Hard Disk Crashes:

Physical hard disk failure: In this situation, there’s utmost chance that all the data can be found still.

To check out this kind of failure, we should distinguish the noise that the disk is making. If you hear a

Clicking, clunking or grinding sound coming from the drive, which belongs to Physical hard disk failure.

Logical hard disk failure: it is caused by the infection of virus, people’s mistake and software malfunction.

All the above two data loss from Hard Disk can be recovered.

As what we have mentioned, it’s possible to recover the loss data. Because when a hard disk drive

crashes, the data are still stored in somewhere that we cannot see them. And this give us chance to

recover data from the hard disk. All you have to do is make the best decision——WiseRecovery.

How to use the free hard disk data recovery software?

Wiserecovery Free Edition is free and easy hard disk data recovery software. There are three recovery modules on the main window of the interface:

1. Download WiseRecovery Data Recovery Software, install it and launch it. Click the “Start Scan” button on the main window of Data WiseRecovery.

2. You can see the list of all volumes found on your computer, select the exact drive and click the “Next” button to start scanning. If you can’t see the drive, please make sure your external drives are connected, and click ‘Refresh’ button.

3. It will take about 2-10 minutes to scan, it depends on your disk size and files amount on the disk. After scanning is finished, you can preview text document and picture files.

Note:If you are not able to get the desired results after Deleted File Recovery, go back to home window and select the option “RAW Recovery” or “Partition Recovery “.

4. Select the files or folders that you want to recover and press the “Recover” button, on the popup window, please select target directory to save the recovered files. WiseRecovery will recover files instantly. Now you can click ‘open the destination directory’ button to see the recovered files!

Note: Please don’t recover the file to the disk you are recovering files from!


How to Recover Lost Digital Media Files

Apart from using computer to connect with the outside world, we also use computer to store many important digital media files. Digital Media files include such as photo, audio file, video file and others. Sometimes you can view these photos and video to enjoy memory and happy time. But if you are careless to delete, format or some operation mistakes, they are gone. Some system cleaner program may also recognize common files as junk files and clean them without going through the recycle bin. These will result in loss of files which cannot be recovered through usual ways. We can not find them in recycle bin or any other hidden folders in the system. That is too bad! In this situation, the easiest way to recover the digital media files with a professional software.

I believe that Wiserecovery is your first and best choice, as it was used by many clients and they all said it is amazing and east-to-use and risk-free when operate. So it’s usually suitable for the aged and those people who are not good at computer.
Wiserecovery can do a good job in digital media files recovery. It cannot only recover all the common file formats, but also recover some abnormal ones. During the process of scanning, it discovers your lost media files automatically and classifies them into different categories according to format, which will help you find the files you want easily.
WiseRecovery has a very fast scanning speed and can recover multiple files at one time. 600+ file types are supported. So great function! What are you waiting for? If you are still puzzled by this kind of problems, you can catch a break. They will refund to users if they are dissatisfied with a product purchased from LionSea and request a refund within 60 days after the purchase. So you can register with confidence!
Now let’s recovery the Lost digital media files:

Step1. Run WiseRecovery, and then click on the button [Start Scan].
Step2. Select a volume to start scan. Then click Scan button to continue.
Step3. The scanning process will start. After scanning, list of file folders will be displayed in the left pane. You can click on each folder to see the hidden files until you find the files you want to recover.
Step4. Click on the folders where the files are put. The details will be shown in the main window. Tick the small box in front of the files you want to recover, and then click Recovery button. There will be a pop up window for you to get the recovered files.

If you want to know more functions of Wiserecovery, please click here: Wiserecovery.

How to Recover Outlook Email

Have you ever been annoyed that you deleted some important letters from the index of your Outlook mail account? This is common situation that is faced by lots of Outlook users and people who unintentionally remove their important letters from their inbox. Many people have encountered this situation and they wonder if it’s possible to completely recover the emails. The answer is definitely yes!

Once an email has been deleted from the inbox, there are still chances that the email can be stored in the trash folder. And you can absolutely move it back to the inbox.

How to recover email manually?

1. Log on your email account.
2. In your folder tree there is a folder named “trash” or “deleted”. Click on it and you can find the emails you deleted before.
3. Find the one you want and click on it and drag it into your “inbox”. You can also right-click on it and there will be an option named “move to”. Click on it and move it to inbox.

However, if the user logs out after having deleted the mail, the email cannot be found. And you really need recovery software to help you.

Wiserecovery is the best software which can recover the deleted Microsoft Outlook PST, WAB and PAB files. PST files are complicated and difficult to recover. Wiserecovey does a perfect job especially on this issue. Once you have recovered the file you can open it in Microsoft Outlook.

Here are few steps to recover the Outlook email by WiseRecovery:

1. Download Wiserecovery, install it and launch it. Click the “Deleted Files” button on the main window of Wiserecovery.

2. Tick ‘Start scan’ to find all lost file types.

3. Select the file types you want to recover.

4. Click “recovery”.

5. You will see you lost emails and you can save them in a safe place.

How to Recover Lost Emails

We have almost say goodbye to writing a letter with paper. Instead, we use emails to communicate with each other more often. This also gives opportunity for some advertisement companies and some other enterprises, they can achieve your email address or your personal information by some illegal means and send emails to you to
disseminate their publicity. When we want to stop these bothering, we have to set that put such useless emails into spam box. But this function is imperfect and when it will send some useful emails into spam box. We are unaware of this and empty it. Before long, we realize this but it is too late to regret.

So we always delete the things we think is useless, but only to find it needed one day after you delete it. Well, to find a deleted email is one of the troubles we will encounter in our day to day life.
Sometimes you can find the emails you have deleted by yourself.

No matter which website you are using you can try this:

  1. Open a browser and log on your account.
  2. Log on your email account.
  3. In your folder tree there is a folder named “trash” or “deleted”. Click on it
  4. You can search for the email you have deleted and move it to your inbox.
  5. You can also resend this email to yourself so that it will show up in your inbox.

If you use outlook:

  • Log on your email account.
  • In your folder tree there is a folder named “trash” or “deleted”. Click on it and you can find the emails you deleted before.
  • Find the one you want and click on it and drag it into your “inbox”. You can also right-click on it and there will be an option named “move to”. Click on it and move it to inbox.

But the easiest way to recover emails is to download Wiserecovery as it has so much functions and support lots kinds of storages and different formats.

After downloading you only need to click some buttons and that will be done. You should own it especially you are not a computer geek.

It can also do recover when you have an accidental formatting or reformat, accidental deletion events or other scenarios.

More information you can get from here:Wiserecovery