English
 Français
 Español
 Deutsch
 Italiano
 日本語
日本語 简体中文
简体中文 繁體中文
繁體中文Human Beings are crazy about watching videos as it’s good way to enjoy life. With the improvement of people’s life, more and more people desire to make videos themselves. Therefore, videos are stored by many people by capturing special moments in their camcorders and other mobile phones or devices. Some people prefer to store their favorite video in their hardware or removal storage media. In this situation, you can never avoid the lost of video files. Because sometimes your card or your computer may be destroyed by accident. In order to avoid this situation, we recommend you to back up the video files in your PC or Compact disk. But what if your video files are deleted or formatted? How to deal with this situation?
WiseRecovery is powerful video recovery software. It not only possesses all the good points but also overcomes the defects of other video recovery software and displays a large variety of advantages as follows:
1.Compatible with all versions of Microsoft Windows OS, such as Windows XP, Windows Server 2003, Windows Vista, Windows Server 2008 and Windows 7.
2. Works with FAT 12, FAT 16, FAT 32 and NTFS file-systems. Recover deleted files from all removable drive formats.
3.Could search and recover video of different file types like AVI, MOV, ASF, MP3, WMV, MP4 etc. due to format, deletion or partition loss from many kinds of storage media such as hard drive, external(removable) hard drive, USB flash drive, digital camera, memory stick, SD card, etc.
4.Supports almost all rare video formats: M4V, DV, 3G2, M4B, AVCHD Video File (MTS), Matroska Video File (MKV), Divx Encoded Movie File (DIVX), OGG Media Player (OGM), MOI Video File, 3G2, Video Object File (VOB), ASX.
All the above features make WiseRecoveryVideo Recovery Software stand out among its competitors.
How to recover lost video files?
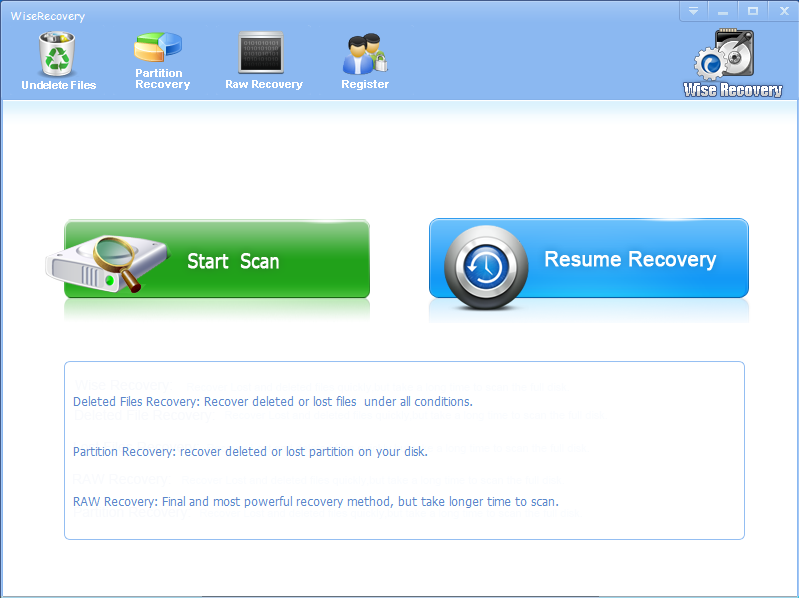
1.Download WiseRecovery Data Recovery Software, install it and launch it. Click the “Start Scan” button on the main window of Data WiseRecovery.
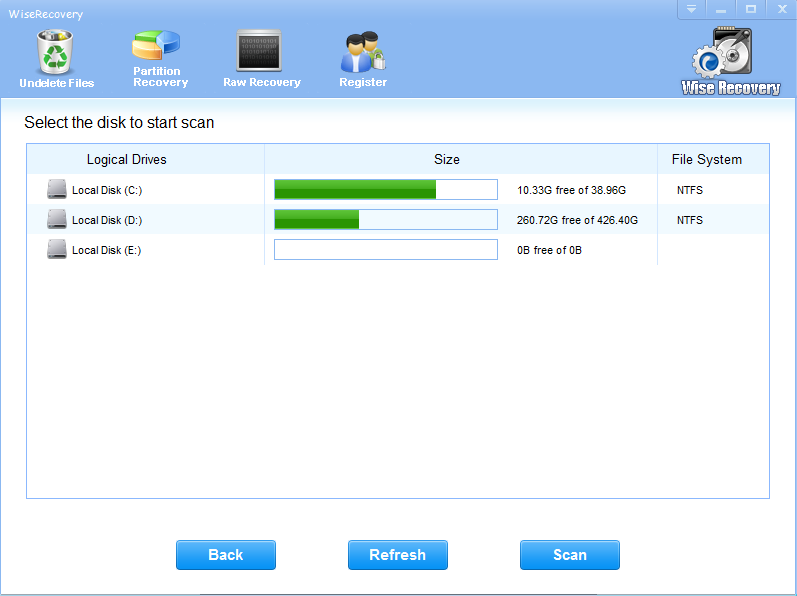
2. You can see the list of all volumes found on your computer, select the exact drive and click the “Next” button to start scanning. If you can’t see the drive, please make sure your external drives are connected, and click ‘Refresh’ button.
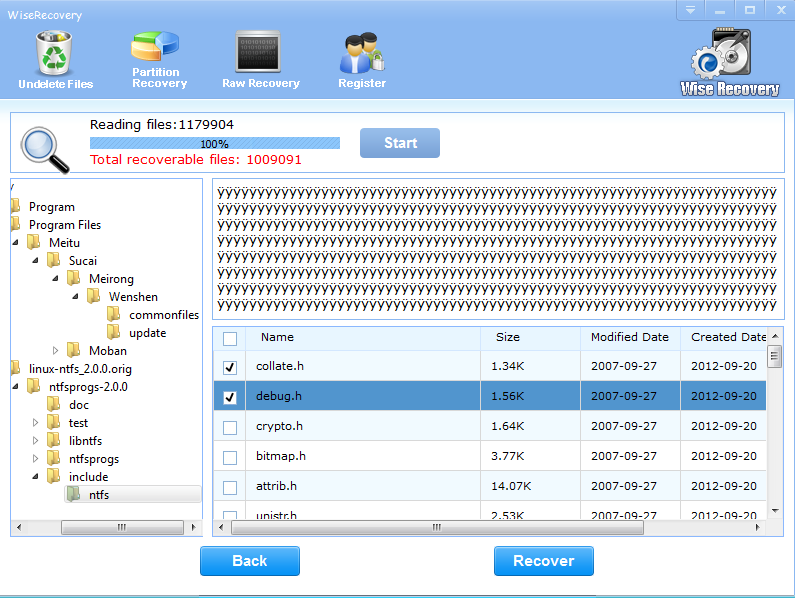
3. It will take about 2-10 minutes to scan, it depends on your disk size and files amount on the disk. After scanning is finished, you can preview text document and picture files.